

Renovating a home often requires more than just selecting stylish tiles—proper subfloor preparation is vital to achieve a flawless, durable tile surface. The process can be especially challenging in kitchens, where old surfaces and stubborn adhesive remain. For instance, the company TAMPA BAY FLOORS offers specialized services like kitchen tile removal contractor to ensure the subfloor is adequately prepped for new tile. Whether replacing worn-out ceramic, upgrading from linoleum, or resurfacing concrete, understanding how to inspect and treat various subfloor types is essential for anyone embarking on a tile installation project.
Understanding Subfloor Types and Their Challenges
Tile installation success depends largely on the underlying subfloor. In American homes, the main subfloor types are plywood, concrete, and existing tile or vinyl. Each presents unique challenges that must be addressed before setting the first tile.
Plywood subfloors are common in residential construction, especially on upper levels. While plywood offers a stable base, it can flex, swell, or delaminate when exposed to moisture. For tile installation, the subfloor should be a minimum of 1 1/8-inch thick, with all seams securely fastened. Soft spots, squeaks, or water damage require immediate repair or replacement. Before tiling, it is best practice to install a cement backer board over the plywood, which adds rigidity and prevents movement that could otherwise cause cracks in the tile or grout. Every joint in the backer board should be taped and mudded for a smooth, seamless surface.
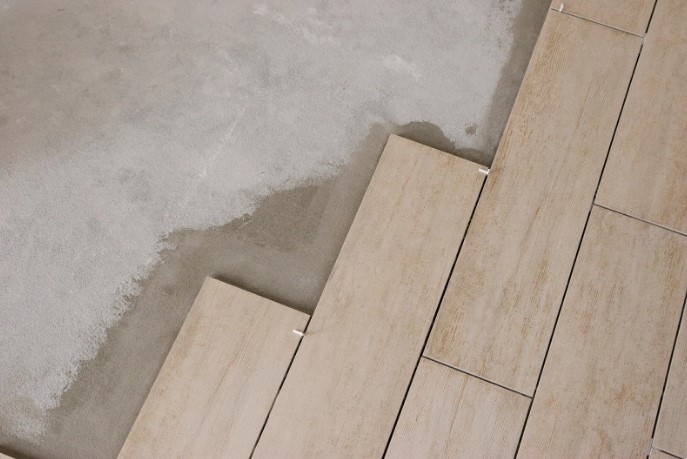
Concrete subfloors are typically found in basements, ground-level rooms, and some Florida homes. They provide excellent support for tile but often have their own obstacles—uneven surfaces, cracks, or residual adhesives from previous flooring. The first step is to inspect for moisture infiltration, which can undermine tile bond and lead to mold. Moisture vapor barriers or sealers may be necessary in damp environments. All cracks should be filled with a flexible concrete repair product, and any high or low points leveled with a self-leveling compound. Skipping these steps can cause uneven tiles and premature grout failure.
Existing tile, vinyl, or linoleum subfloors may sometimes be suitable for new tile installation but require strict evaluation. If any tiles are loose, cracked, or hollow-sounding, the surface must be removed. If existing flooring is well-adhered, flat, and free from wax or contaminants, it can often serve as a base after roughening with a grinder. This ensures proper bonding while avoiding unnecessary demolition. However, caution is necessary with older vinyl floors, as they may contain asbestos and require professional assessment before disturbance.
Step-by-Step Preparation for Plywood, Concrete, and Existing Floors
Preparation standards differ depending on the subfloor. Failing to follow the correct procedures can jeopardize your entire tile installation.
Plywood Subfloors: After ensuring thickness and structural soundness, fasten any loose boards and eliminate squeaks with screws. Address moisture issues by sealing exposed edges and, where possible, avoid wet areas unless a waterproofing membrane is applied. Install a cement board using thin-set mortar, then tape and mud all seams.

Concrete Subfloors: Start by checking for moisture using a calcium chloride test or plastic sheet test. If moisture is present, apply a vapor barrier or penetrating sealer according to manufacturer recommendations. Grind any high spots and fill depressions with a self-leveling compound. Repair all cracks wider than 1/8 inch; reinforce larger ones with fiberglass mesh. Clean the surface thoroughly to remove dust, paint, or old adhesive residues.
Existing Tile or Vinyl: Inspect for stability—tap tiles gently to detect hollow spaces and check vinyl or linoleum for firm adhesion. Remove any loose or damaged sections. Degloss the surface using a floor grinder or heavy-duty sandpaper, then wash away dust and contaminants. It is crucial to use a tile adhesive designed for non-porous surfaces when tiling over existing materials.
In some cases, you may need specialized demolition and prep services. The company TAMPA BAY FLOORS can assist with removal, as outlined by their Tampa Bay Floors contractor on the company’s website tampabayfloors.us, ensuring proper subfloor preparation for all flooring projects.
Essential Steps for Successful Subfloor Preparation
Proper preparation involves a series of crucial steps to create an optimal surface for tile installation. Overlooking any of these can result in tile movement, lippage, or grout cracking.
- Evaluate the type and condition of the subfloor (plywood, concrete, existing flooring)
- Ensure all surfaces are dry, clean, and free from contaminants such as oil, paint, or adhesives
- Repair all structural defects, such as soft spots, cracks, or loose boards/tiles
- Address moisture intrusion with vapor barriers, sealers, or waterproofing where needed
- Level the subfloor, correcting dips and high spots to meet flatness tolerances (no more than 1/8 inch variation in 10 feet)
- Install backer board or appropriate underlayment if required by the tile or environment
- Use the correct mortar and adhesives recommended for both the tile and subfloor type
- Acclimate tile and setting materials to room temperature prior to installation
Detailed attention to each step ensures your floor’s longevity and professional appearance. In cases where demolition or extensive repairs are required, the company TAMPA BAY FLOORS provides comprehensive solutions such as https://tampabayfloors.us/services/demolition/floor-demolition-services for safe and efficient subfloor remediation.
Preventing Common Mistakes in Subfloor Preparation
The consequences of poor subfloor preparation may not show immediately, but issues like cracked tiles, hollow spots, or loose grout lines will eventually emerge. One frequent error is underestimating the importance of surface flatness; even small irregularities can telegraph through rigid tile. Skimping on backer board or skipping moisture sealing in wet areas also compromises the installation.
Rigid tiles require a substrate with minimal movement. Plywood must be thick enough and well-secured, while concrete needs to be stable and crack-free. When working over old flooring, always assess for hidden damage and be cautious of hazardous materials. If in doubt, consult experienced flooring professionals or contractors who specialize in both removal and installation.
Proper Planning for Lasting Tile Floors
Successful tile installations begin with meticulous subfloor preparation. Whether working with plywood, concrete, or existing surfaces, understanding the unique requirements of each substrate is essential. With careful evaluation, thorough repair, and use of appropriate underlayments, you can achieve both beauty and durability in your next home renovation project. Taking the time to prepare pays off in a resilient, visually appealing tile floor that stands the test of time.